How Can We Help?
How to Create Student Accounts
Whether you are going back to the classroom or working with students online, having student accounts in ClassHook is incredibly helpful. ClassHook has created a simple way to streamline the creation of student accounts, so you can assign clips, avoid the problem of lost passwords, and much more. This article will walk you through the creation of a class and how to create student accounts.
Note: ClassHook assumes you have parent permission to add emails of students under 13. Please ensure that you do have parental permission if you’re creating accounts for students under 13.
Video Tutorial
Step 1: Create your class
If you already have class set up on ClassHook, you can skip this step and go on to step 2.
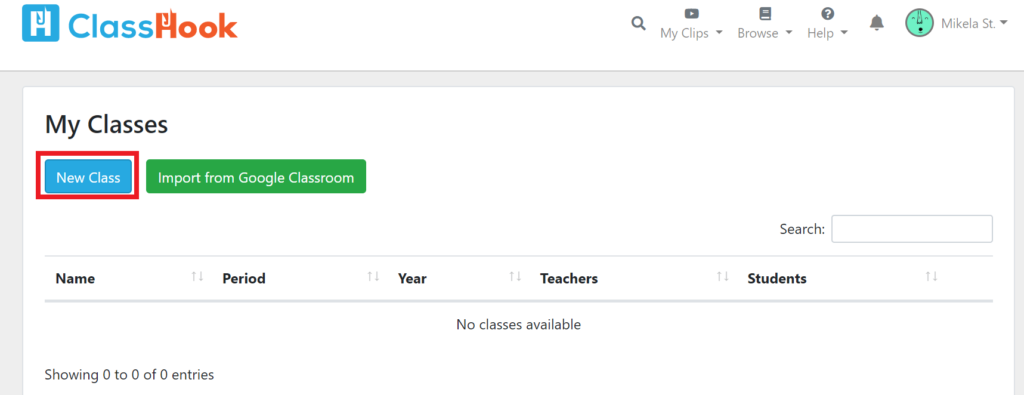
Go to the courses section on ClassHook. You can either create a new class, import a class from Google Classroom, or select a class you already have.
In order to create your class, click the “New Class” button under “My Classes.”
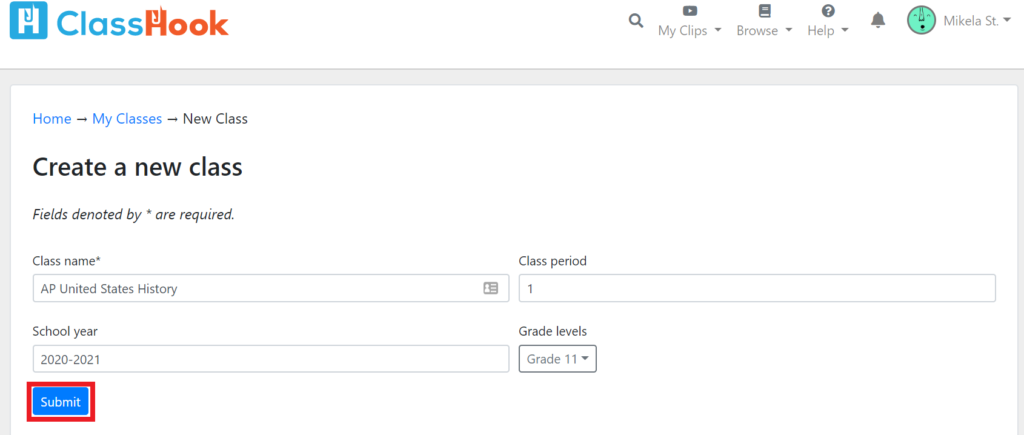
After you click “New Class,” a window will appear where you can enter all the information about your class. Fill out this form with as much information as you like. The only required field is class name, but, to help you stay organized, you can add period, grade (from a dropdown menu), and school year. Once you’ve filled out the form, click “Submit.”
Step 2: Select your class
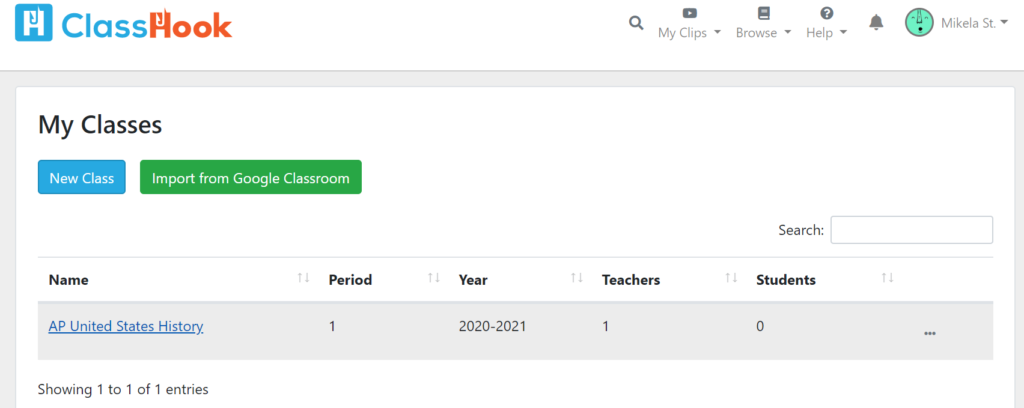
Once you have your class that you would like to add students to, select it from the courses page. This is the same page we used to create a class.
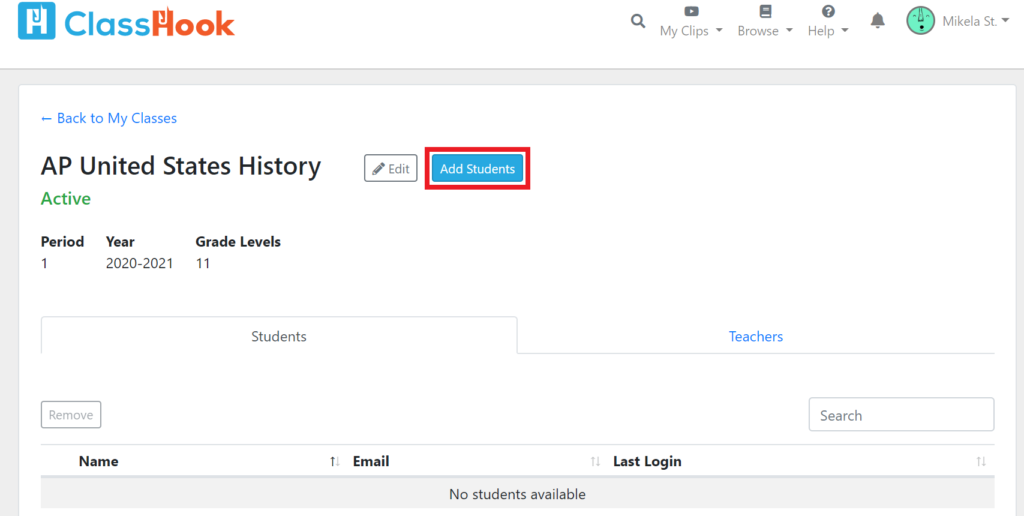
Step 3: Click “Add Students”
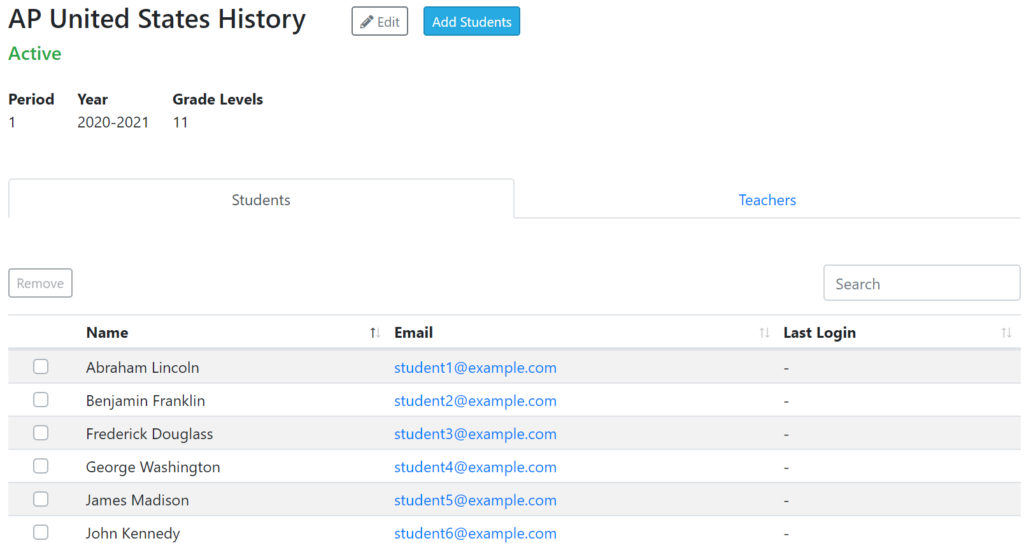
After you select your class, you’ll be taken to a window with all the class information. Click “Add Students,” which can be found next to the class title and edit button.
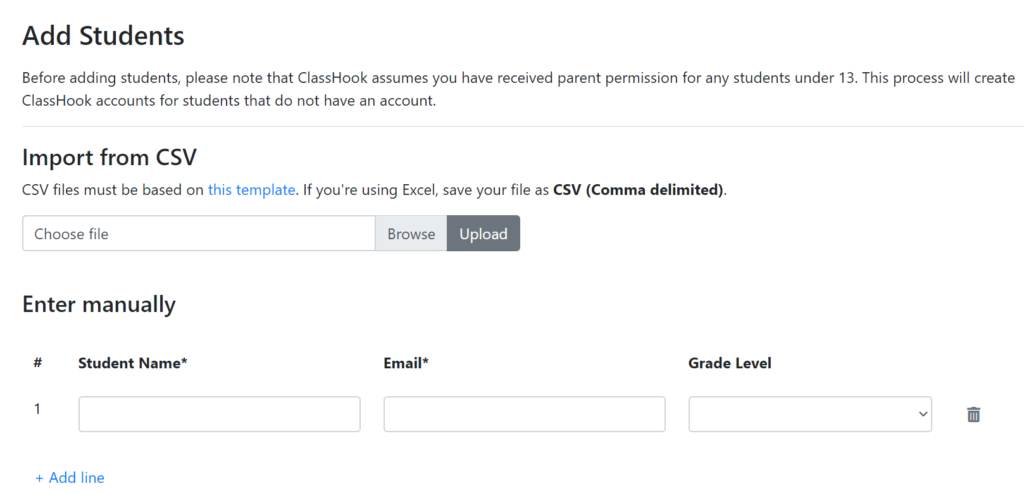
Step 4: Add students
After you click “Add Students,” a landing page will appear with all the information you’ll use to add students in the following steps. ClassHook gives you two options to add students: either using CSV or manually. Skip to whichever step you want to use.
Once you follow the steps using CSV or manual, go on to step 5 (which is on the same level as step 4 in the table of contents).
Add students using CSV
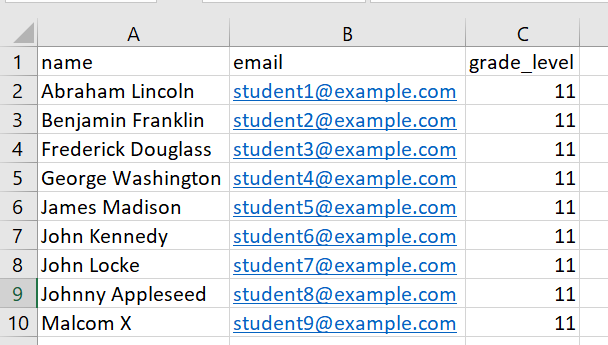
1. Create your CSV file
CSV files must be based on this template, which can be found on the add students page. The template asks for name, email, and grade level. If you already have an Excel file with this information, you can manipulate it to the format of the template and save it as a CSV.
Your CSV should resemble this:
2. Upload the CSV
Once your CSV file is ready, save your CSV in an easy to find place. Under the “Import from CSV” section, choose your CSV and press upload.
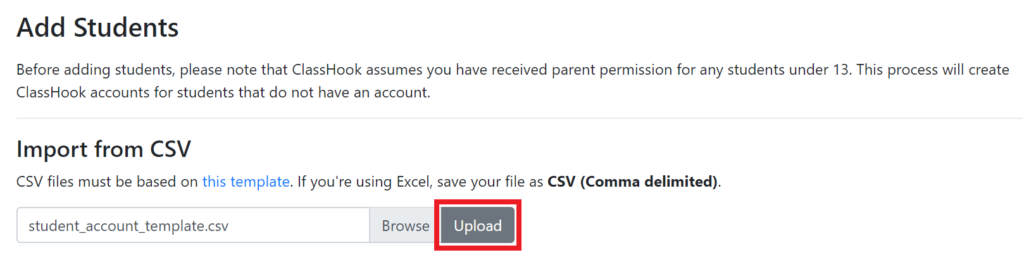
After you click “Upload,” ClassHook will populate the manual section with the information from the CSV. This is a good time to double-check the information.
3. Click “Create Student Accounts”
Underneath the student information, click “Create Student Accounts.”
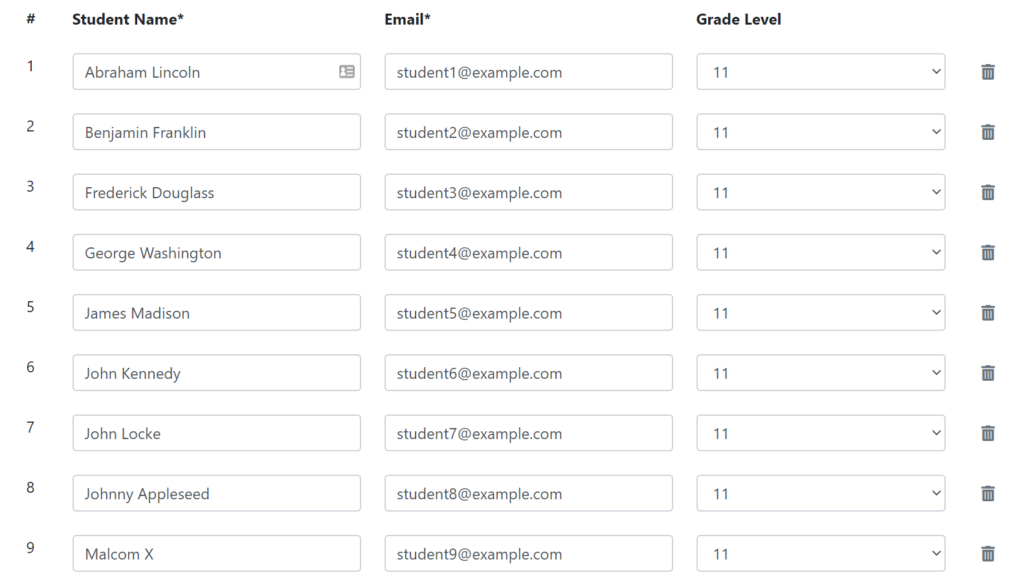
Add students manually
1. Add students
Using the form under “Enter manually,” enter each student’s name, email, and grade level.

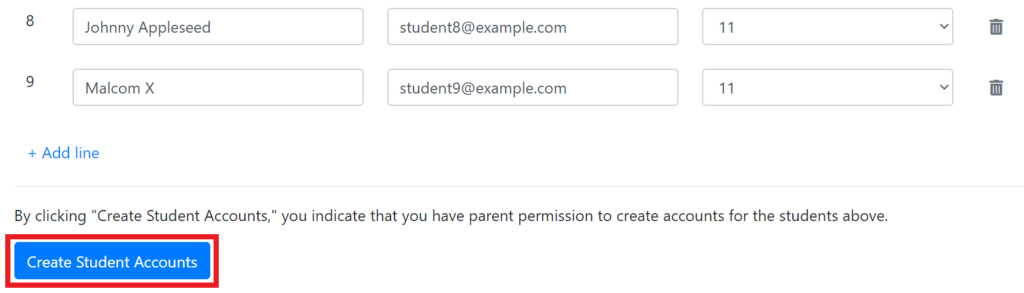
Add all your students, clicking “Add line” (found below the students) to add each student.

2. Click “Create Student Accounts”
Underneath the student information, click “Create Student Accounts.”
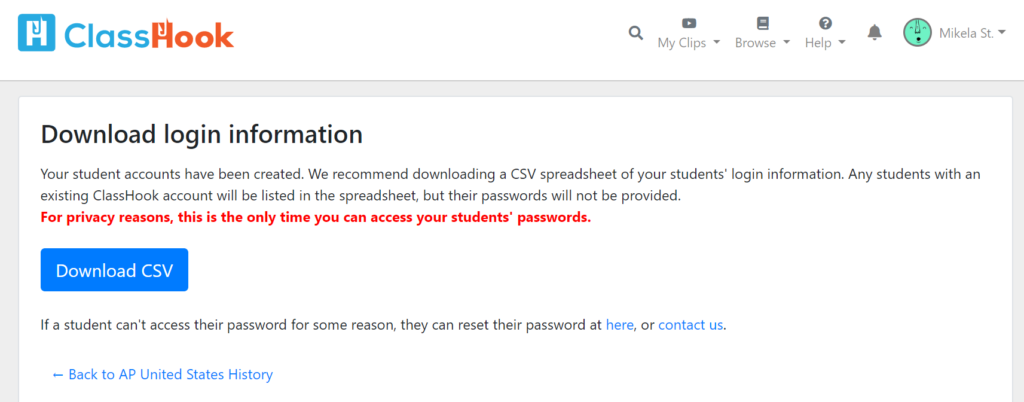
Step 5: Download information for student accounts
After you create student accounts, you will be able to download their student passwords from a CSV file. This is the only time you can do so, so make sure you save the file. If a student already has a ClassHook account, you will not be able to see their password.
If a student can’t access their password, they can reset it here, or you can contact us.
Step 6: Voila!
Congratulations! You have successfully created student accounts! The students will appear in your class to edit as needed.